

From the Desk of Clearissa Coward’s Command Center – Divinely Organized
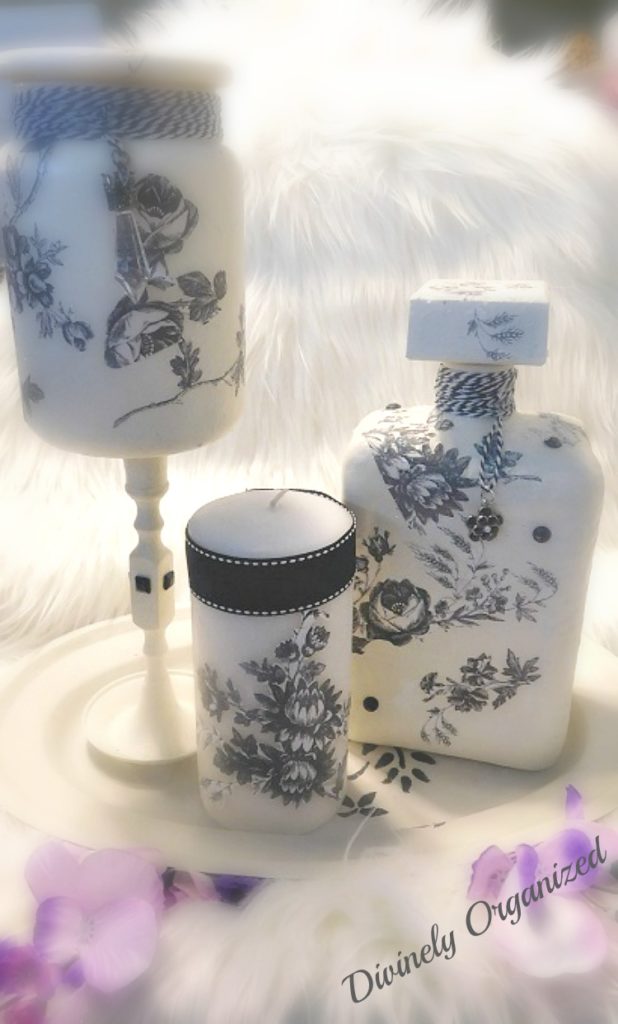
The Black and White Upcycle Project…Plus
What a mess. Yes, a Mess! I thought I had all of this “before” footage for this project; however, once I checked my camera, it wasn’t there. Nope, nada, no. No footage. Well, not what I thought I had. But I am nothing if I am not resilient and improvision is my middle name. Therefore, I decided that if I couldn’t bring you a video of the steps to complete the Black and White Upcycle Project, I could have pictures of the before and after along with step-by-step instructions. And that my friends is what we have.
I almost squashed this project, but I decided not to allow circumstances to make all of my work null and void. So, let’s get started with this project. Let’s improvise. Let’s not allow past circumstances to dictate future success. Let’s create!
There are affiliate links within this post. However, all opinions and ideas are my own. Clicking on and using the links to purchase products does not increase your cost at all. See my complete policy here. I appreciate your support.
How It Began:
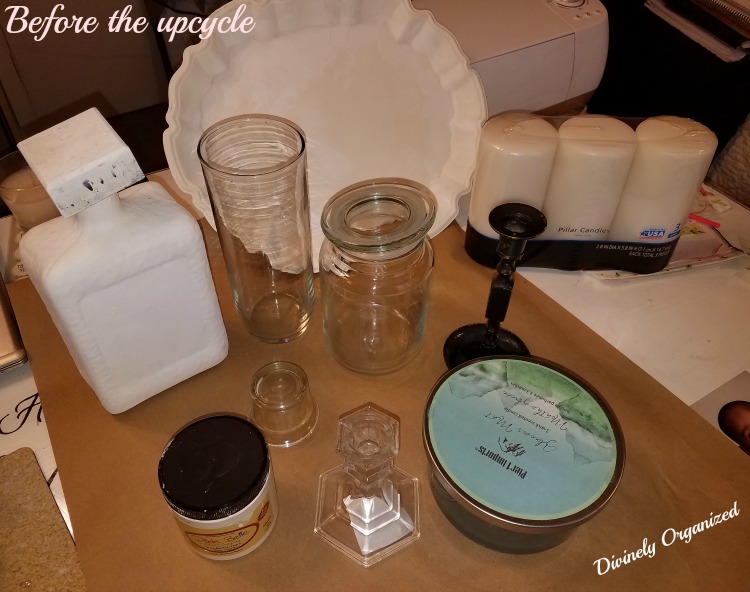
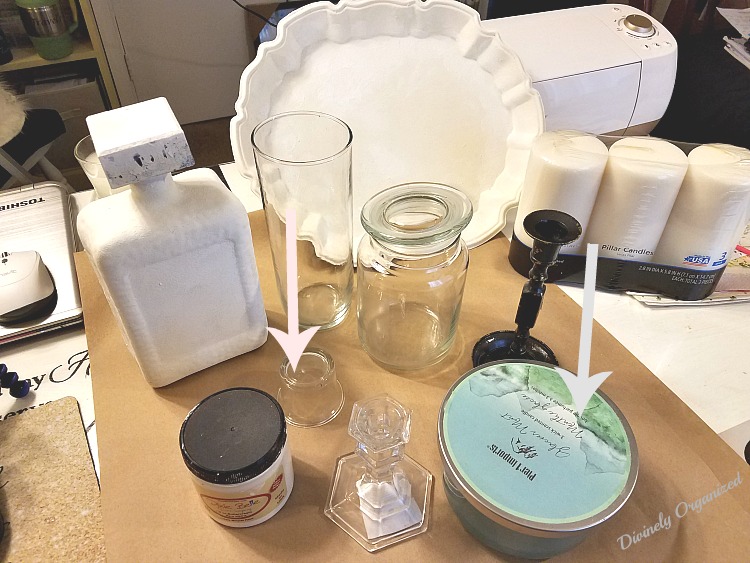
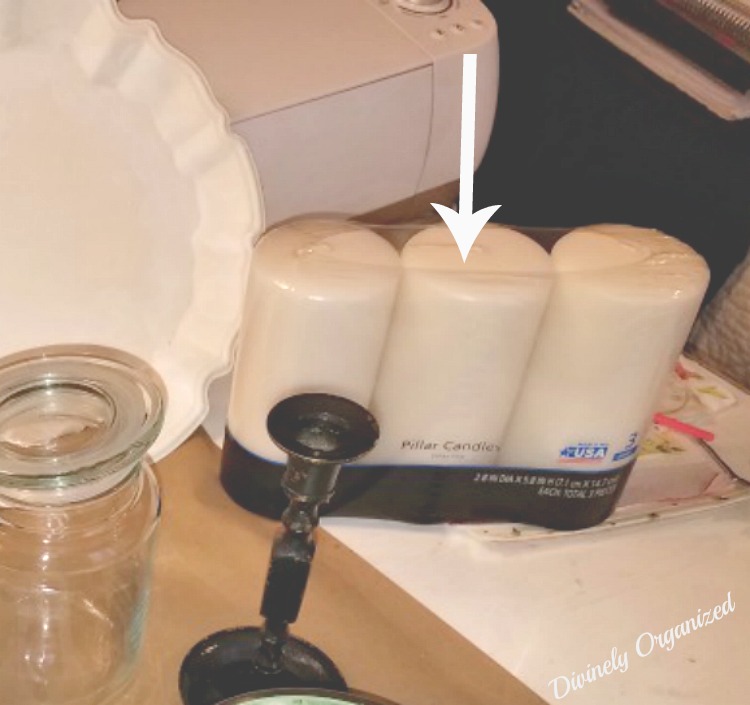
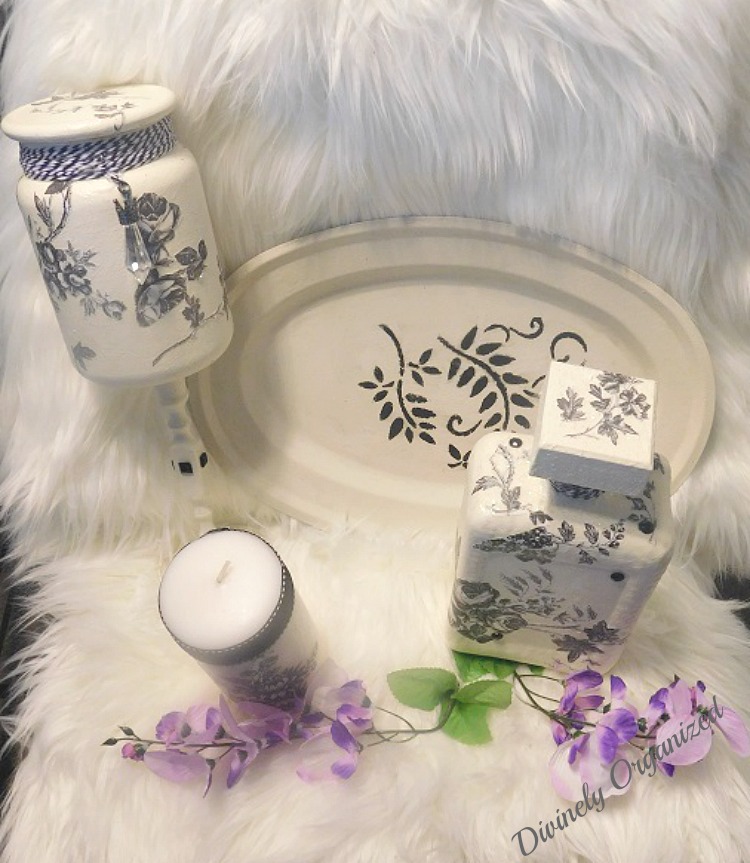
I had a very successful thrifting haul. The items I picked up were random. Nothing was the same and there was nothing that appeared to be related but they all spoke to me and of course when thrifting, the most important thing is price and in the case of all of these items, the price was right.
As you can see, there are quite a few thrifted items. However, the candles were not thrifted and the liquor bottle that is already painted in the photo was gifted to me by one of my friends. Also, at the posting of this article, I found another one of the short jars and although they are not completely black and white, they were a part of this thrifting haul and therefore became a part of the “Black and White Project”.

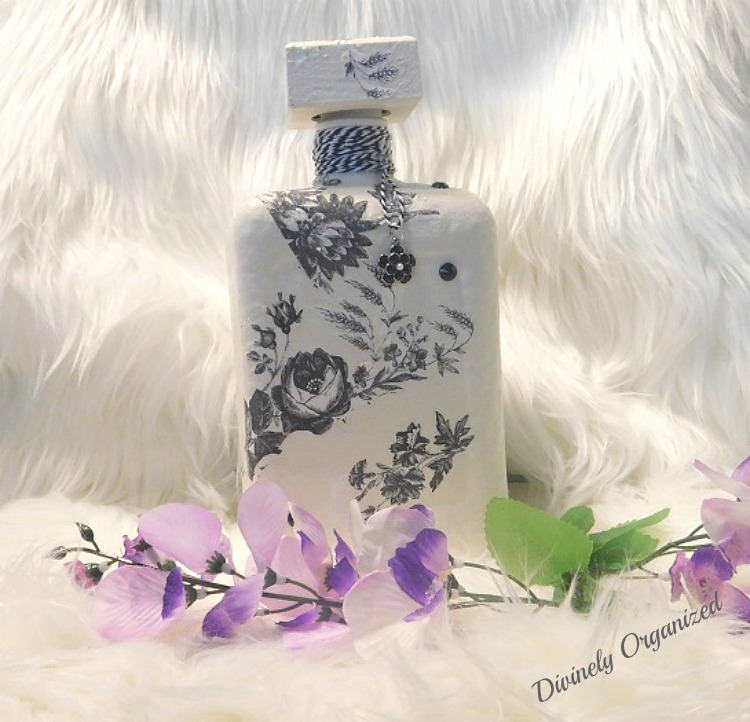
The Liquor Bottle:
This bottle was a gift from my friend. They collect them for me. It was a see-through bottle and I had painted the first coat of paint before I decided to make this a blog/vlog project. The first step was to add what ended up being two coats of chalk paint. For all these pieces I used Dixie Belle, Buttercream as the basecoat.
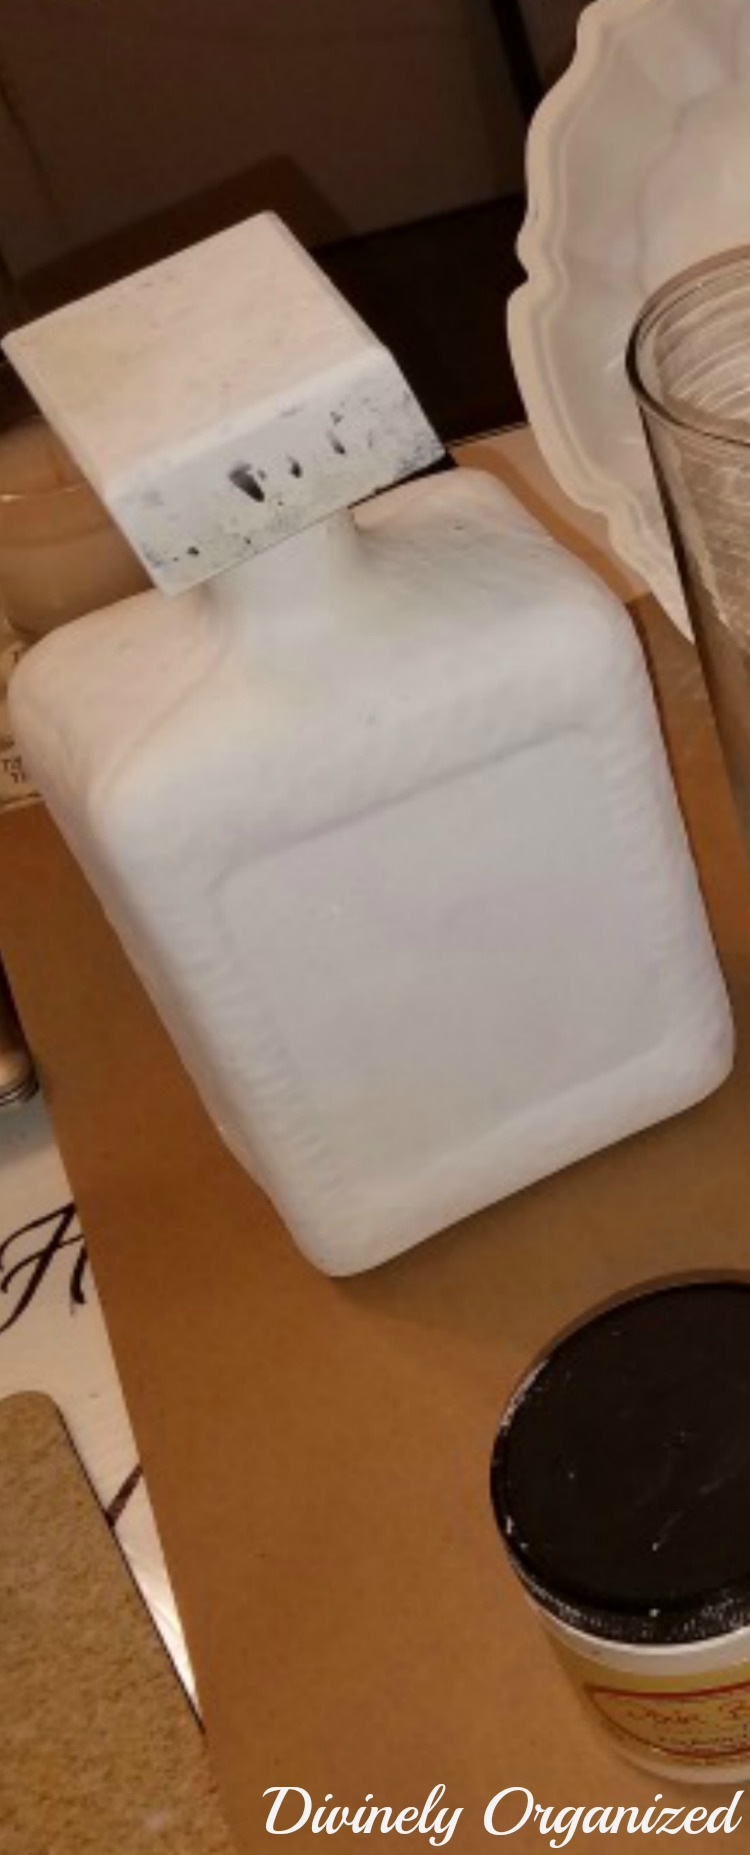
1. Paint bottle with 2 coats of chalk paint
2. Find a paper you love
3. Cut out the designs from the paper you’ve chosen
4. After the paint is completely dry add first layer of Mod Podge
5. Apply paper cut outs
6. Smooth paper using plastic wrap
7. Add second and third coats of Mod Podge (allow to dry between coats)
8. Finish with Satin finish clear coat
9. Wrap twine around the top of the bottle and add a trinket for style (optional)

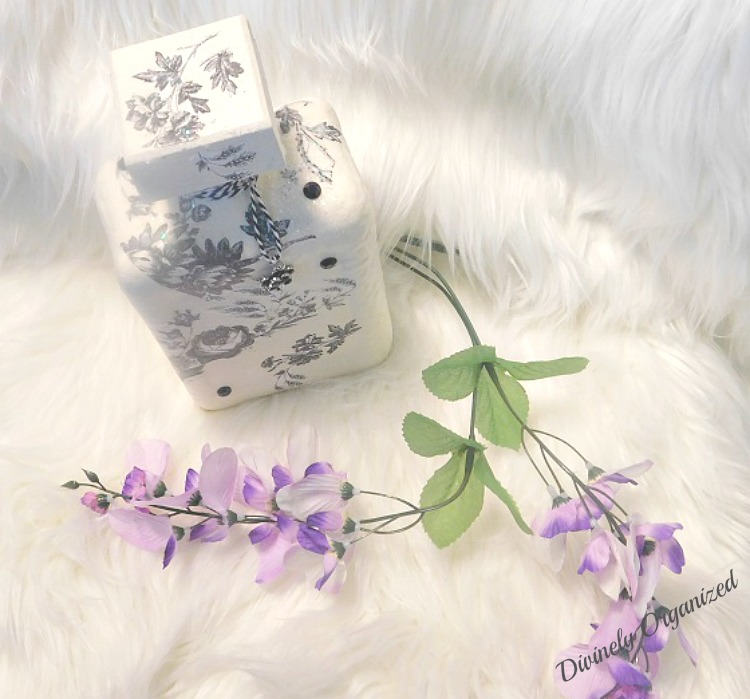
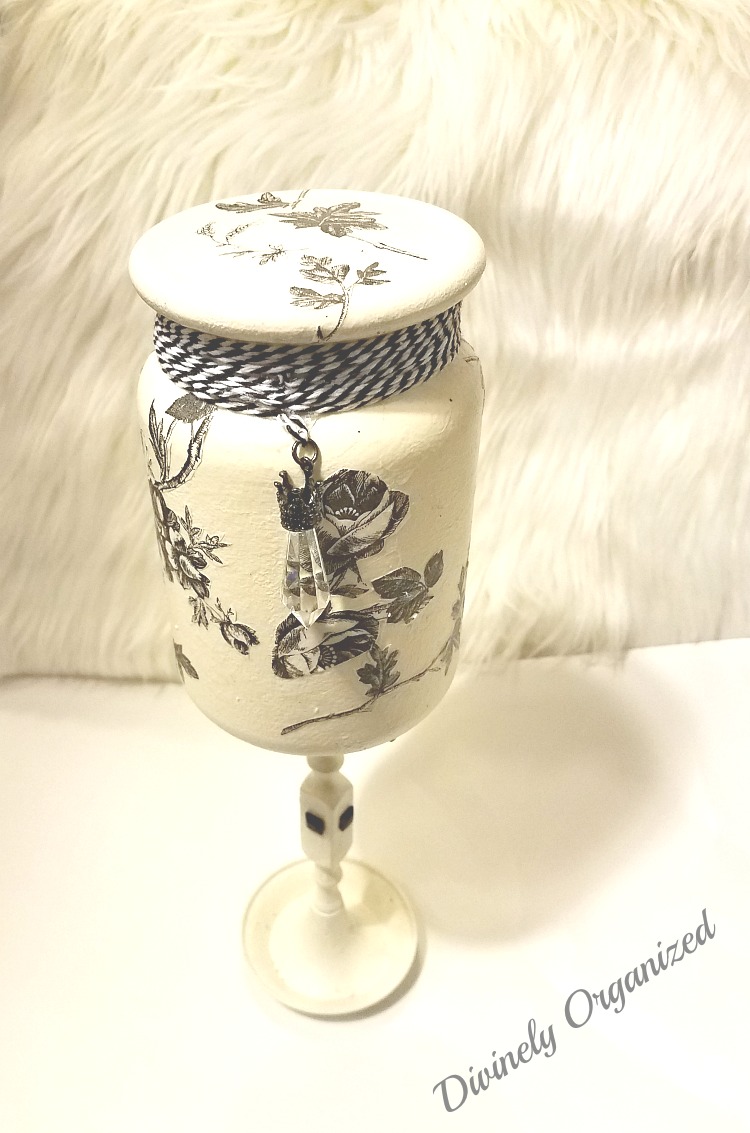
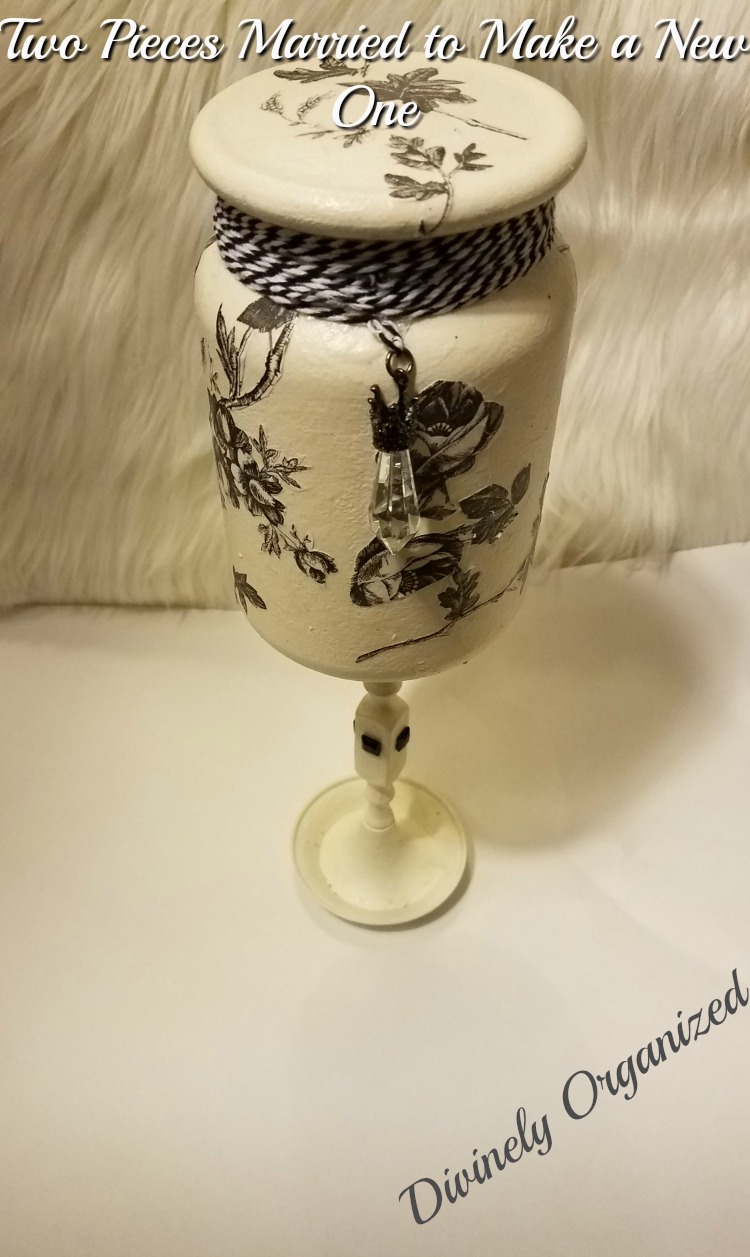
Jar and Candle Holder Combined:
The next upcycle was the jar and the long-stemmed candlestick. I married the two pieces.
1. Add two coats of chalk paint to both pieces
2. Glue the candlestick to the bottom of the jar (I used E6000) be sure to center
3. I like to allow the glue to dry overnight for best permanent adhesion results (this is optional)
4. After the paint is completely dry add first layer of Mod Podge
5. Smooth paper using plastic wrap
6. Apply paper cut outs
7. Add second and third coats of Mod Podge (allow to dry between coats)
8. Coat with Satin finish clear coat
9. Wrap twine around the top of the bottle and add a trinket for style (optional)

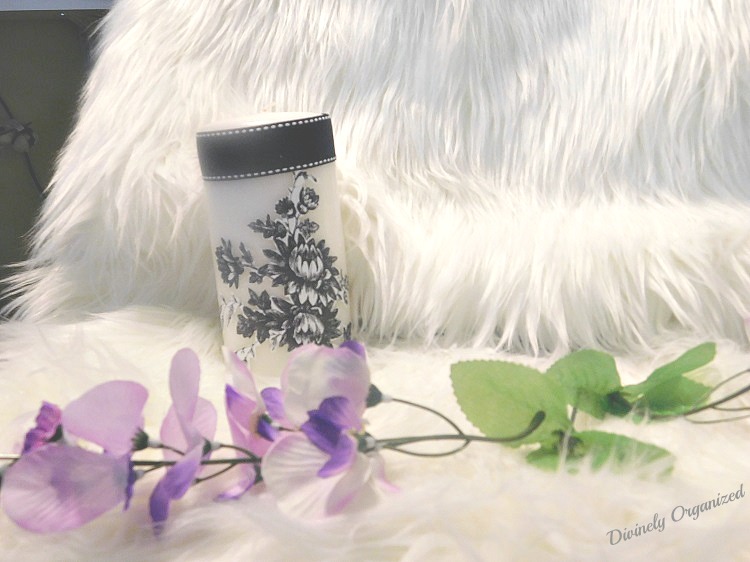
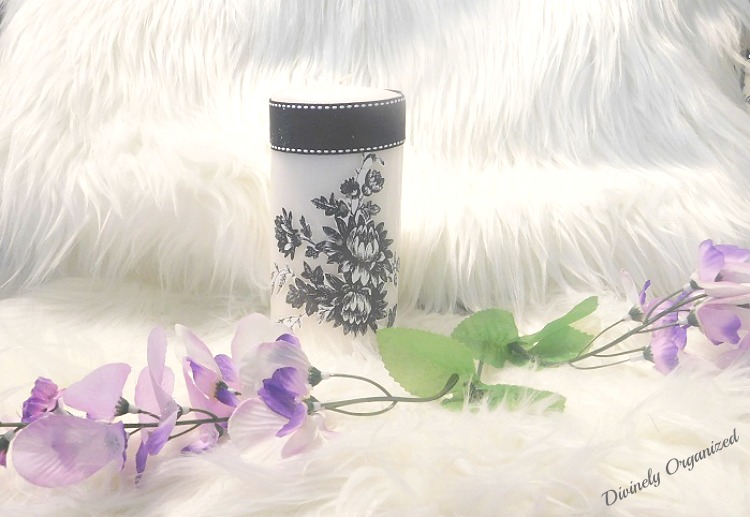
The Candle:
I cannot call the project with the candle an upcycle because they were new, but I can call the project a DIY. The candle is a plain, unscented, white candle. Boring…right? Not for long!
1. You will need a sheet of parchment paper, hairdryer, the shape(s) you want to add and ribbon for this project
2. Choose a picture you like from either a napkin or thin shelf or scrapbooking paper
3. If the paper is too thick it will make it more difficult to melt the paper into the wax
4. Cut out the shapes of the paper you want to add
5. Place your paper/napkin where you would like it on the candle and place your parchment paper tightly over the chosen design
6. Turn your blow dryer to medium or high heat
7. Run the dryer over the design you’ve chosen making sure to hold the parchment paper tight
8. Do not touch the parchment with the hairdryer but do get very close
9. Once the wax begins to come up over the design, you can remove the parchment paper to check your project
10. If not completely embedded, continue to heat until the design becomes a part of the candle
11. Always remember to re-wrap the parchment paper over the design while heating (this will not only protect the design but your fingers as well – The wax gets really hot)
12. I also added a piece of ribbon that I hot glued to the to top of the candle (optional) to finish it off

The Tray:

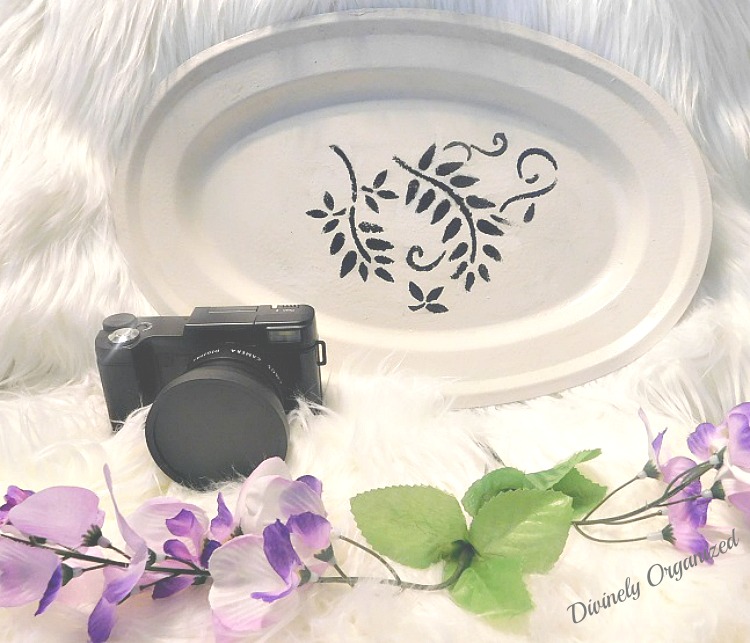
The tray was a silver tray I thrifted quite a while back. It has been simply hanging around so I thought I would add it to this upcycle.
I am sorry to say I do not have a before of the silver tray. But if you thrift at all and even if you don’t, you know that these little silver trays are everywhere. So, close your eyes and imagine a $1.50 silver tray from a thrift shop. If you check out my YouTube page, you will see the before in the video.
![]()
That’s It:
That’s it for the black and white project friends. I do have a little footage and will upload that along with some other pictures to my YouTube channel as well.
Remember to Subscribe today! Never miss another post and let’s stay connected.
You can also purchase this grouping here.
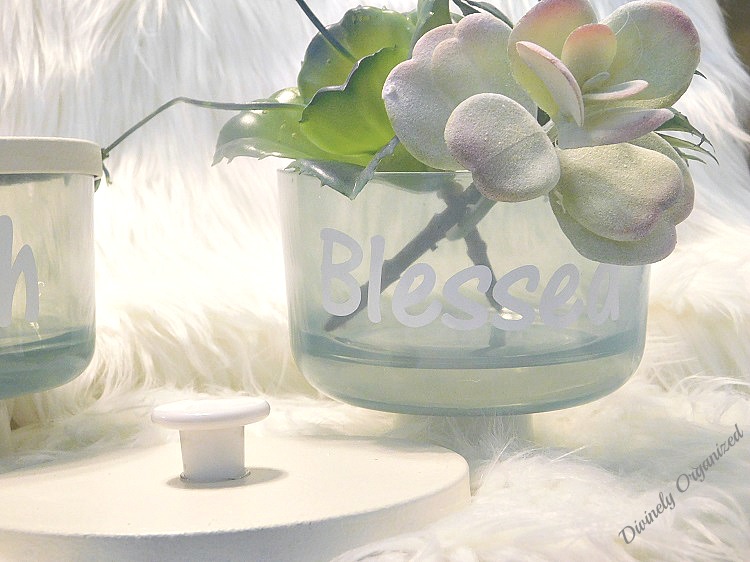
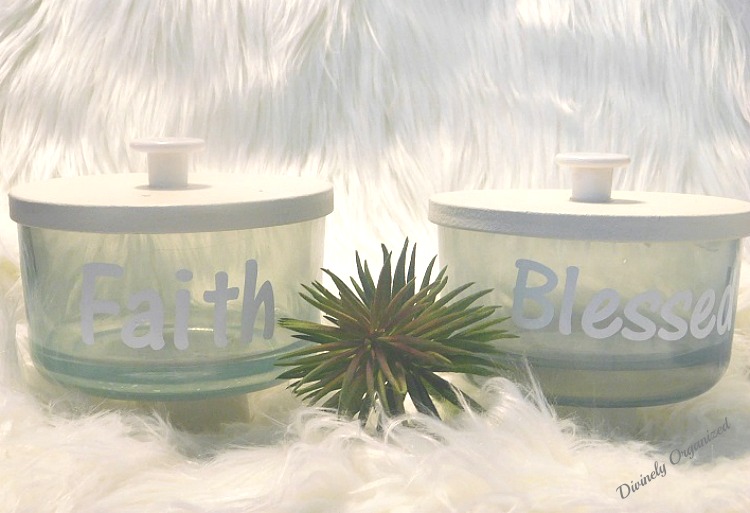
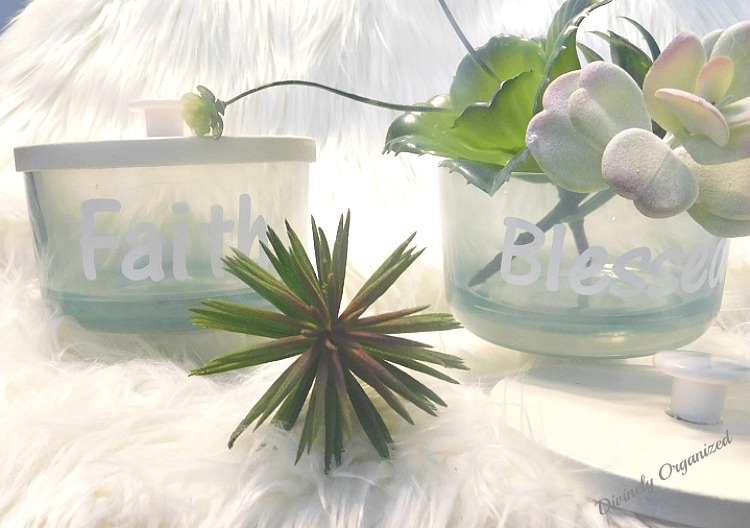
Bonus:
Need a little more cute storage? Of course, you do. Who doesn’t? I have the perfect upcycled storage for jewelry, cotton swabs, cotton balls or wipes, makeup, craft supplies, pet snacks, the list is endless. Let’s see where it began.
I married the two pieces above to create decorative storage pieces.
1. Paint the votive candle holder on the inside and the top of the upcycled candle jar the same color. Again I chose Buttercream
2. While the paint dries glue the candle jar to the votive candle holder (make sure the votive candle holder is turned upside down and glue the candle jar to what is usually the bottom of the votive candle holder
3. I liked the color of the candle jar so I did not paint the entire jar but you can if you like
4. Choose a drawer pull that you like and glue that to the top of the container (optional)
5. This step is totally optional – I cut the words Faith and Blessed using my Cricut and added them to the two containers for an added touch of personalization
That is the black and white project. Although a bit time-consuming, the upcycle projects were pretty simple and enjoyable. Let me know if you try any of the projects or if you are interested in purchasing any of the items they will be available in my online craft boutique.
I hope this post has encouraged you to look around your house and find things you would normally toss and find a different use for them. Sometimes all it takes a little paint and some shelf lining paper that is just lying around doing nothing. Other times it may be a piece of furniture everyone has given up on but you see something or actually feel something that will not allow you to toss it. Look at those pieces again. Perhaps you will need to bring them together or maybe you just need to see them through the eyes of your creativity. What have you got to lose? It is so rewarding when everything old is new again.

Don’t forget to check out my eBook; Organize Your Life in 21 Days. It is available for download and has a variety of small projects to help you take on and complete organizational projects. Some you may not have even thought of. Get your copy today.
Never miss another article, tip or project. Get them delivered directly to your email. Subscribe today! And let’s stay connected.
Thank you guys for all of the support you show to me and my blog. I feel so blessed because of you.
 Until next time…I remain in my Element – God Bless!
Published:

Interviewed/Featured:
Don’t forget to share this post with your friends. I greatly appreciate it.
Thank You for Stopping By!
XOXO,
![]()

What a wonderful idea and they all look so beautiful! Has given me some good ideas thank you.
Very nice upcycle Miss Clearissa! Pinned and shared!
Thank you Carol. I appreciate that.
These are lovely! I feel inspired.
Wow. Love the look you have achieved. Thanks for sharing the steps involved. You might just inspire me to do some crafting.
Yay Renee,
I am so glad my pieces have inspired you. Find some stuff and have fun. 🙂
Hi Vicky,
You are very welcome. I am happy I inspired you. Have some fun with it and please let me know what you decide to work on. I would love to see your finished products.
Beautiful transformation! I love how you took a hodge podge group of items and now have a lovely cohesive collection! ‘Very clever! -Marci @ Stone Cottage Adventures
Great ideas! And I have a lot of chalk paint that I need to use up, so I’ll be on the lookout for some cool bottles and vases that I can transform. Your results were stunning!
Truly stunning and so creative. I love black and white too!
Clarissa your talent in taking simple items and turning them into useful and beautiful pieces amazes me. Love these.
I loved all of your upcycled items. I really liked the storage items. Projects are not my cup of tea but I love it when others do these things.
Thank you Candy. I’m glad you like it. 🙂
Thank you Amy. This was a fun project. It started as one piece and continued to grow. I had to make myself quit. 🙂
Hi Jean, thank you so much. Good luck with your projects. It is so much fun and almost anything can be upcycled. We have to just think outside of the box. 🙂
Hi Marci,
Thank you so much. I had to make myself quit. 🙂
Thank you Victoria. I love the project side of decorating. But I am running out of space. Etsy here I come. 🙂
Everything looks so nice, really like it all! As for not having a video of the steps, you can take your photos and instructions and turn them into a video! You can easily use iMovie, Windows Live Movie Maker, or check out Lumen5, so easy! Shared x 4 ♥
What charming creations! The black and white make it very classy 🙂
This is amazing! And it took real courage to embark on this project!
Thank you Clearissa for linking up and co-hosting at the #BloggingGrandmothersLinkParty 26 with me! I shared your post x 4 ♥
I love these. Black and white is so classic and classy!
🙂 gwingal
You are very creative and talented, Clearissa.
Pinned and shared!
Thank you Donna. I really appreciate the support. Thank you for stopping by.
Hi Nikki,
Thank you, yes it is and can mix and match with so many other colors as well.
Thanks Dee. It is indeed my pleasure. 🙂
Hi Michele,
Thank you. The project was actually a lot of fun. I had to make myself stop because I had other items I could add to the collection. 🙂
Hi Betty – NZ and thank you. It was a fun project. I may still add a few more items to the collection. 🙂
Hi Dee,
You are always so full of helpful information. I am going to take some time and look into some of the movie software you mentioned. Thanks again. 🙂
Beautiful projects! You are very talented!!
This is such a great way to turn a bunch of different items into one cohesive group. I really like the tray. Thank you for linking up with us at the #HomeMattersParty this week.
Thank you Lori. I appreciate your support.
Thank you so much Nicole. It was a really fun project.
I apologize for the late notice!! Congratulations! Your post was my feature pick at #ThursdayFavoriteThings this week. Visit me at https://www.marilynstreats.com on thursday morning to see your feature! All hosts choose their own features from the comments left on their blog so be sure to return to my blog to see your feature. I invite you to leave more links to be shared and commented upon. Please don’t forget to add your link numbers or post title so we can be sure to visit!
Hi Marilyn,
I found it earlier and what a wonderful surprise. I an honored. Thank you so much for choosing my project as your feature. I appreciate it. 🙂
Pingback: BLOGGING GRANDMOTHERS LINK PARTY 27 - Grammy's Grid
Thank you for sharing this. One of my favourite pieces is from my childhood. A school friend was to give a gift and she wanted it to be special. Her aunt painted glassware…. kittens in a basket. I just love it 60 years later!
Hi Dorothy,
What a precious memory. I turly believe that sometimes the best gifts are those that someone has personalized and poured their hearts into just for you. Thank you for stoppng by. 🙂
Thank you. 🙂
Love it Clearissa!! it has given me some inspiration, thanks for sharing it. Hugs from Spain
Thank you Noelia. I appreciate the support. That is what I love about the internet…meeting great and like-minded people. Let me know how yours come out. 🙂