

From The Desk of Clearissa Coward’s Command Center – Upcycling
Upcycling – Taking It ‘Oh No’ to ‘Oh My’
Hello Lovies, it’s been over a week since we have connected. I’ve been as busy as a little bee working on upcycling and organization projects as well as planning a little get-away for me and the hubs and all of the exciting things it takes to help with the sending my granddaughter off to her first prom. Whew!!! it’s been busy around here. But I made time for a little Upcycling – Taking It ‘Oh No’ to ‘Oh My’.
Through it all, I have spent a few minutes here and there upcycling a few pieces. I have a stash of “waiting to be upcycled” stuff that has to be twiddled down because my friends are continually bringing me things (jars, bottles, trays, you name it) to upcycle. I am running out of storage space and need to complete some of the projects and get them up for sale. You can find many of my crafts and upcycles in my Craft Boutique on my site. I am also thinking of opening an Etsy shop. Stay tuned for that.
I have done similar projects before. You can find one such project here. First things first, you will need to clean your jars and remove all labels.
What you will need:
Empty jars
Craft Paint (I used Chalk Paint)
Napkin (I have several sources for napkins)
Decoupage Glue (I used Mod Podge Matte)
Sponge Brushes
Rubbing Alcohol
Clean rag or paper towel
Matte Varnish
Plastic Wrap
Process:
Paint the jar the color/colors of your choice and allow to dry thoroughly (this may require 2 coats)
Choose your napkin and separate it from the backing (some are 2-ply others 3-ply) Separate until all you are left with is the picture (1 ply)
Position the napkin where you want it to go on the jar, bottle, etc
Begin applying the decoupage glue from the center of the napkin moving toward the edges (apply enough to secure the napkin without saturating)
Allow to dry thoroughly (around 30 minutes)
Once dry, apply a second coat of decoupage glue
Allow to dry thoroughly
Apply a thin coat of matte varnish
Allow to dry thoroughly (may take up to 3 hours)
Apply a second coat of matte varnish
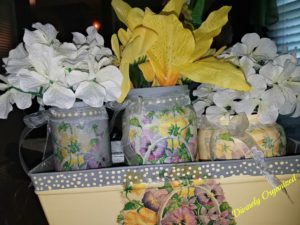
Although the process is the same for this project as it is for any that I paint and decoupage, the finished products are always unique and different as is the case with hand-made items.
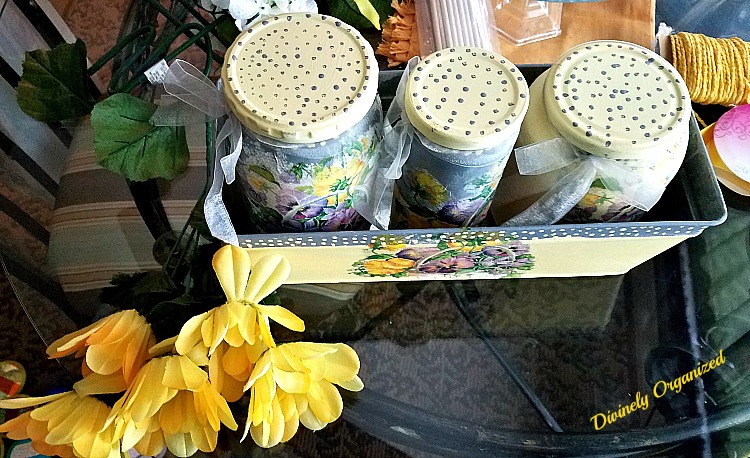
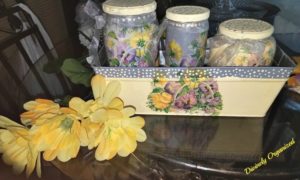
I love the yellow and gray together.
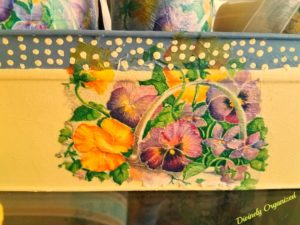
The summer flowers are perfect for this color scheme. This is a metal tray that is gray on the inside which sparked the idea for the color scheme.
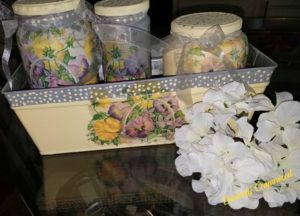
These are so colorful that I chose not to add a lot of bling. Just a sheer gray ribbon on each.
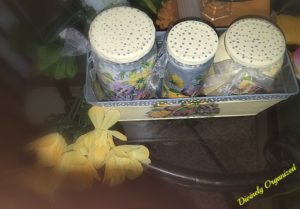
Can be displayed with lids or without as vases, makeup brush holders, kitchen gadget holders, etc. The possibilities are endless.

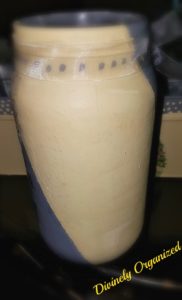
This is a view of the back of the jar. I apologize for the blurry picture.
These little beauties would make great gifts for teachers. There are so many uses for these jars. Abd because I have kept and painted the tops, you can fill them with goodies and give as gifts.
If you would like to shop this project see below.
Napkins (these are just a suggestion, there are many to choose from)
Napkins (another choice)
If you are interested in purchasing, these items will be up in my craft boutique tomorrow.
If you would like to see a video tutorial, let me know in the comments and I will put one together for you. I hope you have enjoyed this little upcycle project. it just goes to show that almost anything can be upcycled or recycled. Do you agree?
There could be affiliate links within this post. However, all opinions and ideas are my own. Clicking on and using the links to purchase products does not increase your cost at all. I appreciate your support.
Never miss another article, tip or project. Get them delivered directly to your email. Subscribe today! And let’s stay connected.
Until next time…I remain in my element
Published:
MomsMagazine.com
IBA.com
Blogher.com
Hubpages.com
Interviewed/Featured:
IBA.com
Don’t forget to share with your friends. I greatly appreciate it.
Thank You for Stopping By!

What a beautiful project! Thank you for the instructions on how to do this.
Hi Gentle. You are so welcome. I have been wondering if I should do a video to show my readers how to do this. By the way, I love the name of your brand. Gentle Joy is so pretty.
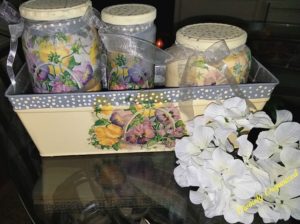
The up-cycled jars are perfect for summertime decor. The decoupaged floral motif is quite attractive. These jars would have so many purposes, and they’re very pretty, too.
Hi there Carol. Thank you so much. I always love it when you stop by. I’m happy you liked this project.
I’ve written a post about my efforts at trying this, which were not as good as yours, and I put links and pictures to your blog in that post as the example of what it looks like when you do it right. I hope you don’t mind. I will send you the link when I the post goes up. I’m still trying but I don’t seem to have the magic touch like you do. 🙂
Thank you Pam. I don’t mind at all that you have shared my link and I will be waiting for the link. Thank you so much for sharing my work. Thank you. Thank you.
You did a great job, love them. I like the color combination too! You really should open an Etsy shop 🙂 Thank you Clearissa for attending the #WednesdayAIMLinkParty. I shared your post.
Hi Dee. Thank you. I have been thinking about opening an Etsy shop. Thanks for the confirmation. 🙂 I am glad you liked them.
Pingback: Wednesday AIM Link Party #17 – Grammy's Grid
Congrats Clearissa! Your post is Featured at the #WednesdayAIMLinkParty. See here: http://grammysgrid.com/wednesday-aim-link-party-17/
Oh Wow!!!! Thank you for the feature Dee. 🙂
Wow!!! Thank you so much Dee. 🙂
I’ve read and re-read the instructions and still confused…what do need/use the rubbing alcohol and plastic wrap for?
Hi Lin. I’m sorry you’re confused. I probably should have explained better. I use the alcohol to clean the services before painting. It’s just to make sure there is no oil or any other residue so everything will adhere. The plastic wrap is used to smooth out the napkins after the glue is applied. If you use your bare fingers the napkins will tear but if you use plastic wrap, you can smooth out wrinkles without tearing the napkin. I hope that helps. I will be working on a similar upcycle soon. Maybe I will video that one and that way you can see all of the steps. Would that help?