

From The Desk of Clearissa Coward’s Command Center – Divinely Organized
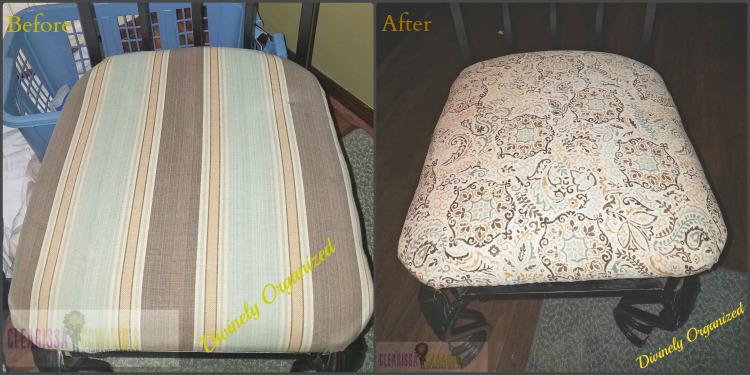
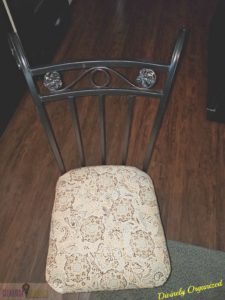
Kitchen Chair Upcycle – Summer 2017
Hey, lovies. I hope you all are ready to enjoy your holiday. We aren’t doing much this year. Can you believe hubs and I are not having the kids over for a family bar-b-que? Surprise, we are not. We did that for Father’s Day because as I have mentioned before, hubs goes in on Thursday for a full knee replacement and we are just trying to tie up loose ends and prepare for this ordeal. It will be a quiet day for us.
However, my nerves are shot. I guess I am just afraid for him. And what do I do when I’m stressed. Yep, something creative! This weekend I cleaned like a crazy person, including window seals and moving furniture…the whole nine yards. I also recovered my kitchen chairs.
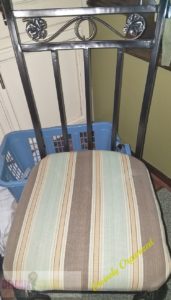
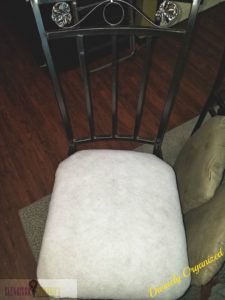
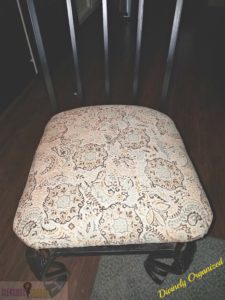
I loved the striped fabric; however, it has seen better days and a good refresh was due. And besides, I am going through a bit of stress right now. I wish the photos were better and the colors were vibrant but both fabrics are actually very colorful. It’s funny or shall I say strange that the photos look great before I upload them to WordPress and once I do, the color seems to wash out. If you have tips for alleviating this, I would love to hear them. Okay back to the project.
If you follow my blog, you know we have been through this process before; however, I am going to give you the steps anyway just in case there are some newbies. Also, if you are a regular, I want to take you along for the journey and the quick and relatively easy update.
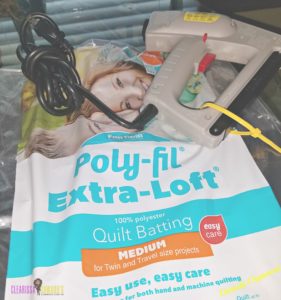
What You Need
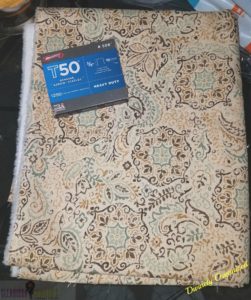
Fabric (I always buy more than I need. ½ yard per chair)
Staple Gun
Staples (at least ¾ inch)
Screw Driver (to remove screws from the chairs & to remove old staples)
Batting
Scissors
Process
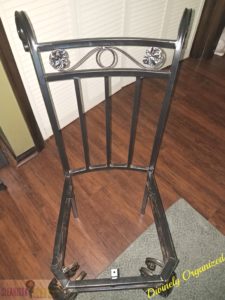
Remove screws from the chair
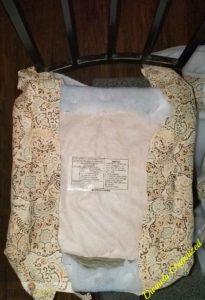
Turn the chair cushions upside down and remove all the staples from the original fabric
Remove the old fabric
Cut and add batting (pull tight and staple to the chair cushion)
Staple one side and pull tight on the opposite side around the chair frame
Do the same on the opposite sides
Continue to add staples around the frame
Optional: Depending on the age and condition of the chairs, you may need to cut and add additional foam cushion to the chairs as well. In this case, I did not but if you do, generally 2” thick foam is sufficient and it is easily cut to size using an electric knife. Please contact me if you need further instruction.)
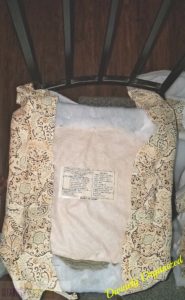
After adding the staples, cut off access batting to make the bottom look as finished and neat as possible.
Cut fabric for each chair. I always add a little more than I need. Why? Because you can always cut off what you do not need, but you cannot add more once it is cut
Just as you did for the batting
Cut and add fabric (pull tight and staple to the chair cushion)
Staple one side and pull tight on the opposite side around the chair frame
Do the same on the other opposite sides
Add staples
Depending on the age and condition of the chairs, you may need to cut and add additional foam cushion to the chairs as well. In this case, I did not but if you do, generally 2” thick foam is sufficient and it is easily cut to size using an electric knife. Please contact me if you need further instruction.
After adding the staples, cut off access fabric to make the bottom look as finished and neat as possible (using pinking shears makes the bottom look even better)
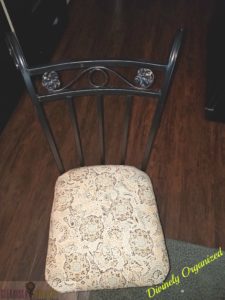
Replace chair cushion frames to the chair and replace screws
Important step…spray 2 – 3 coats of Scotchguard and stain repellents. This will help to protect your new fabric choice for quite some time. It will also help if you are diligent and reapply every 6 months or so. I will admit I did not do that.

Our kitchen is the heart of the home and my grandson never stops eating once he gets here so I really should be diligent and reapply the Scotchguard every 3 – 6 months but I must admit I have not done so. But I also enjoy changing the fabric every couple of years. When and if we replace the chairs, I will always want a style where I can change the cushions with fabric. It is a quick and easy way to update and refresh a space.
I hope you like the fabric. Let me know in the comment section. I like it today but when I run into something I like better, I will purchase for the next update because there will always be an update!! How about you? Do you have a go to update that is simple but always lifts your spirits?
There could be affiliate links within this post. However, all opinions and ideas are my own. Clicking on and using the links to purchase products does not increase your cost at all. I appreciate your support.
Don’t forget to check out my eBook; Organize Your Life in 21 Days is available for download and has a variety of small projects to help you take on and complete projects you may not have thought of. Get your copy today.
Never miss another article, tip or project. Get them delivered directly to your email. Subscribe today! And let’s stay connected.

Until next time…we are In Our Element!
Published:
MomsMagazine.com
IBA.com
Blogher.com
Hubpages.com
Interviewed/Featured:
IBA.com
Don’t forget to share this post with your friends. I greatly appreciate it.
Thank You for Stopping By!


Beautiful chairs! I’ve never tackled a recovering project but your instructions make me think I could do it!
Hi Teresa,
Of course you can do it and if you have any questions, just let me know. Good luck and thanks for stopping by.
Your chair cover came out beautiful, Clarissa! Prayers and good wishes to your husband on his knee replacement. Everyone I know who has had one said the first few weeks are rough but they never regret having it done
Hi PAT. Thank you. Hubs is doing much better. Still some swelling but it is amazing what modern medicine can do. I’m glad you liked the chairs and appreciate the prayers and well wishes sent our way.
The new fabric looks great. Great tip about the stain repellent too!
How’s your man doing after his surgery? I have a friend who went in and the next thing we knew she was up and about and having no pain. I’m amazed at how quickly they get people up and healed these days. I did my dining chairs a few years ago and am about ready to do it again. I love your fabric! I was surprised at easy it was. So much more than decoupaging those dang jars. LOL
Pam you are so funny! Decoupaging those dang jars is really not that difficult. It just takes time to hone your technique. lol My hubs is moving right along with PT. He is getting better every visit. He should be released to go back to work within another 2-3 weeks. Thank you for asking. I’m glad your chairs turned out good. Share pictures. I would love to see them. Take care and talk with you soon.
Hi Amy. Thank you. Yes with grandchildren popping in, I think stain repellent is a must. Please stop by again.
Its amazing how updating a seat cover makes so much difference. Its fairly easy to do as well as long as you have clear instructions. Have a great week.
Hi Leanna. Thank you for stopping by. Yes sometimes it’s the little details that make the big difference. I hope you will stop by again.
This chair cover has turned out so beautiful. It is given a classical retro look.
Hi Stephanie. Thank you so much. I am not really into retro, but I love this fabric. Thank you so much for stopping by. I am glad you liked it.
Great job. My mother and grandmother use to recover everything on a regular basis. The only thing I change regularly is our living room rug. lol
Hi Victoria. You made me laugh out loud. Hey to each his/her own. Perhaps reupholstering is not your thing. That’s okay. Please stop by again!